Tearing Down the Rival Knockout
September 9, 2019The Nerf Rival Knockout is a fun little blaster. 90+ fps, single shot, breech-loading. Inevitably, however, people will decide it should fire harder, or fire things other than Rival balls. So here’s some basic info not covered in the review!
Packed in Tight
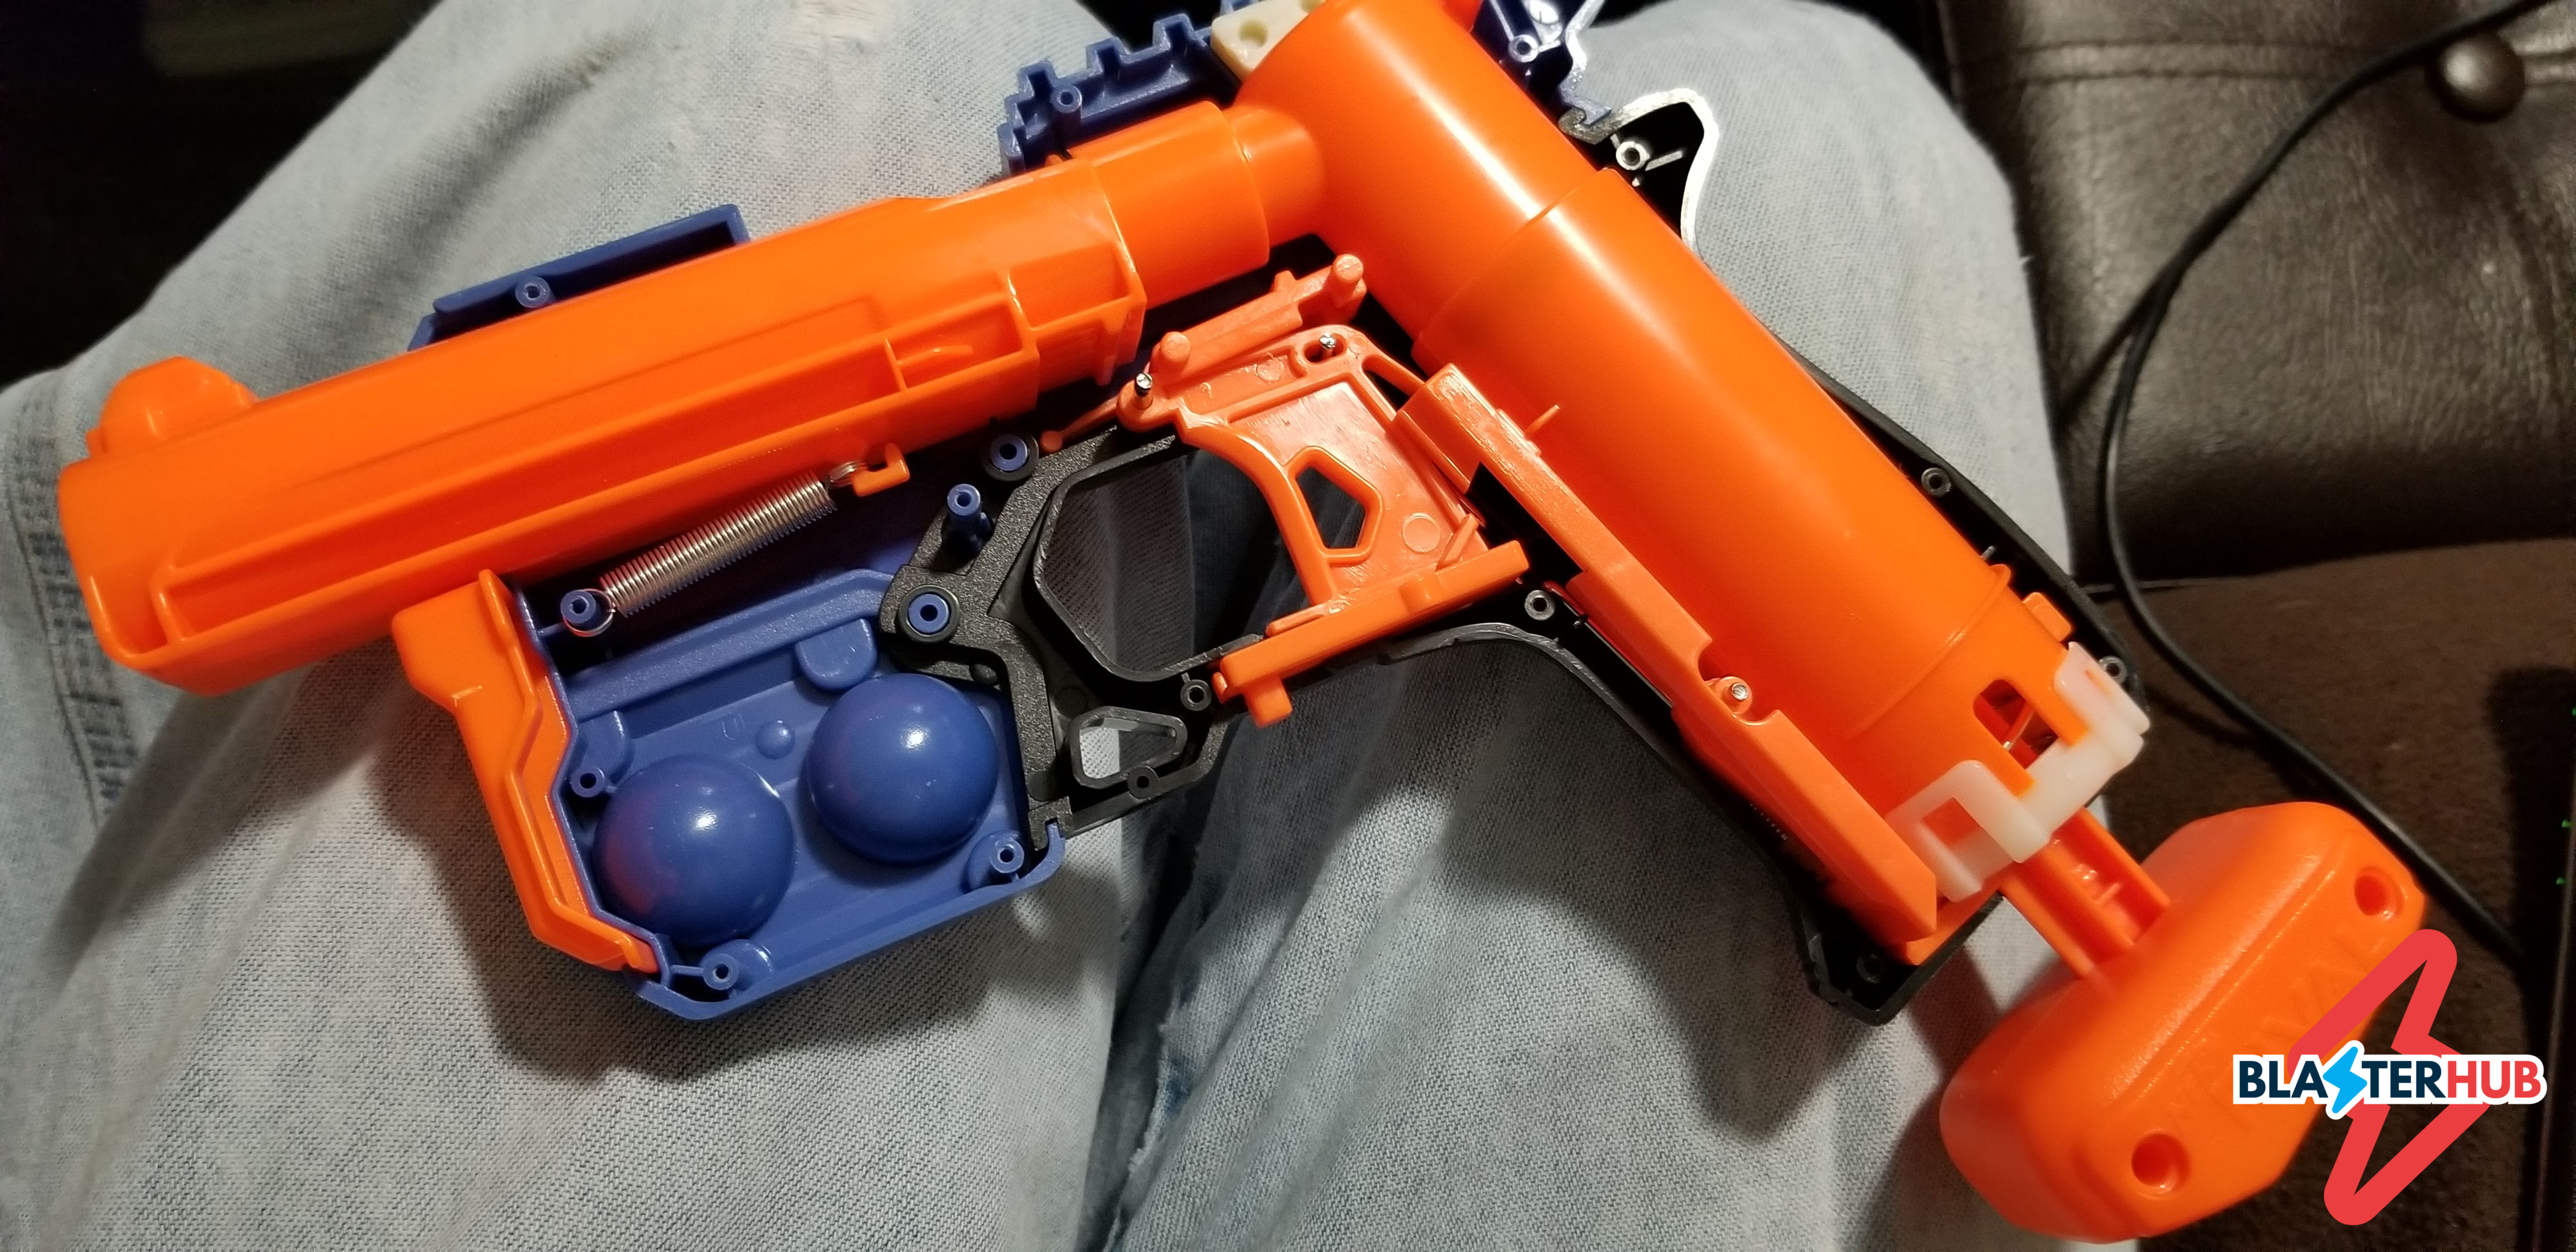 The complete internals. The breech mechanism sits above the trigger, and the safety directly beneath it.
 Looking at the AR that isn't an AR. You can see the end of the plunger in white behind it.
 The base of the plunger tube, solvent welded in place. The long orange rod blocks the trigger until the plunger rod is pushed back up.
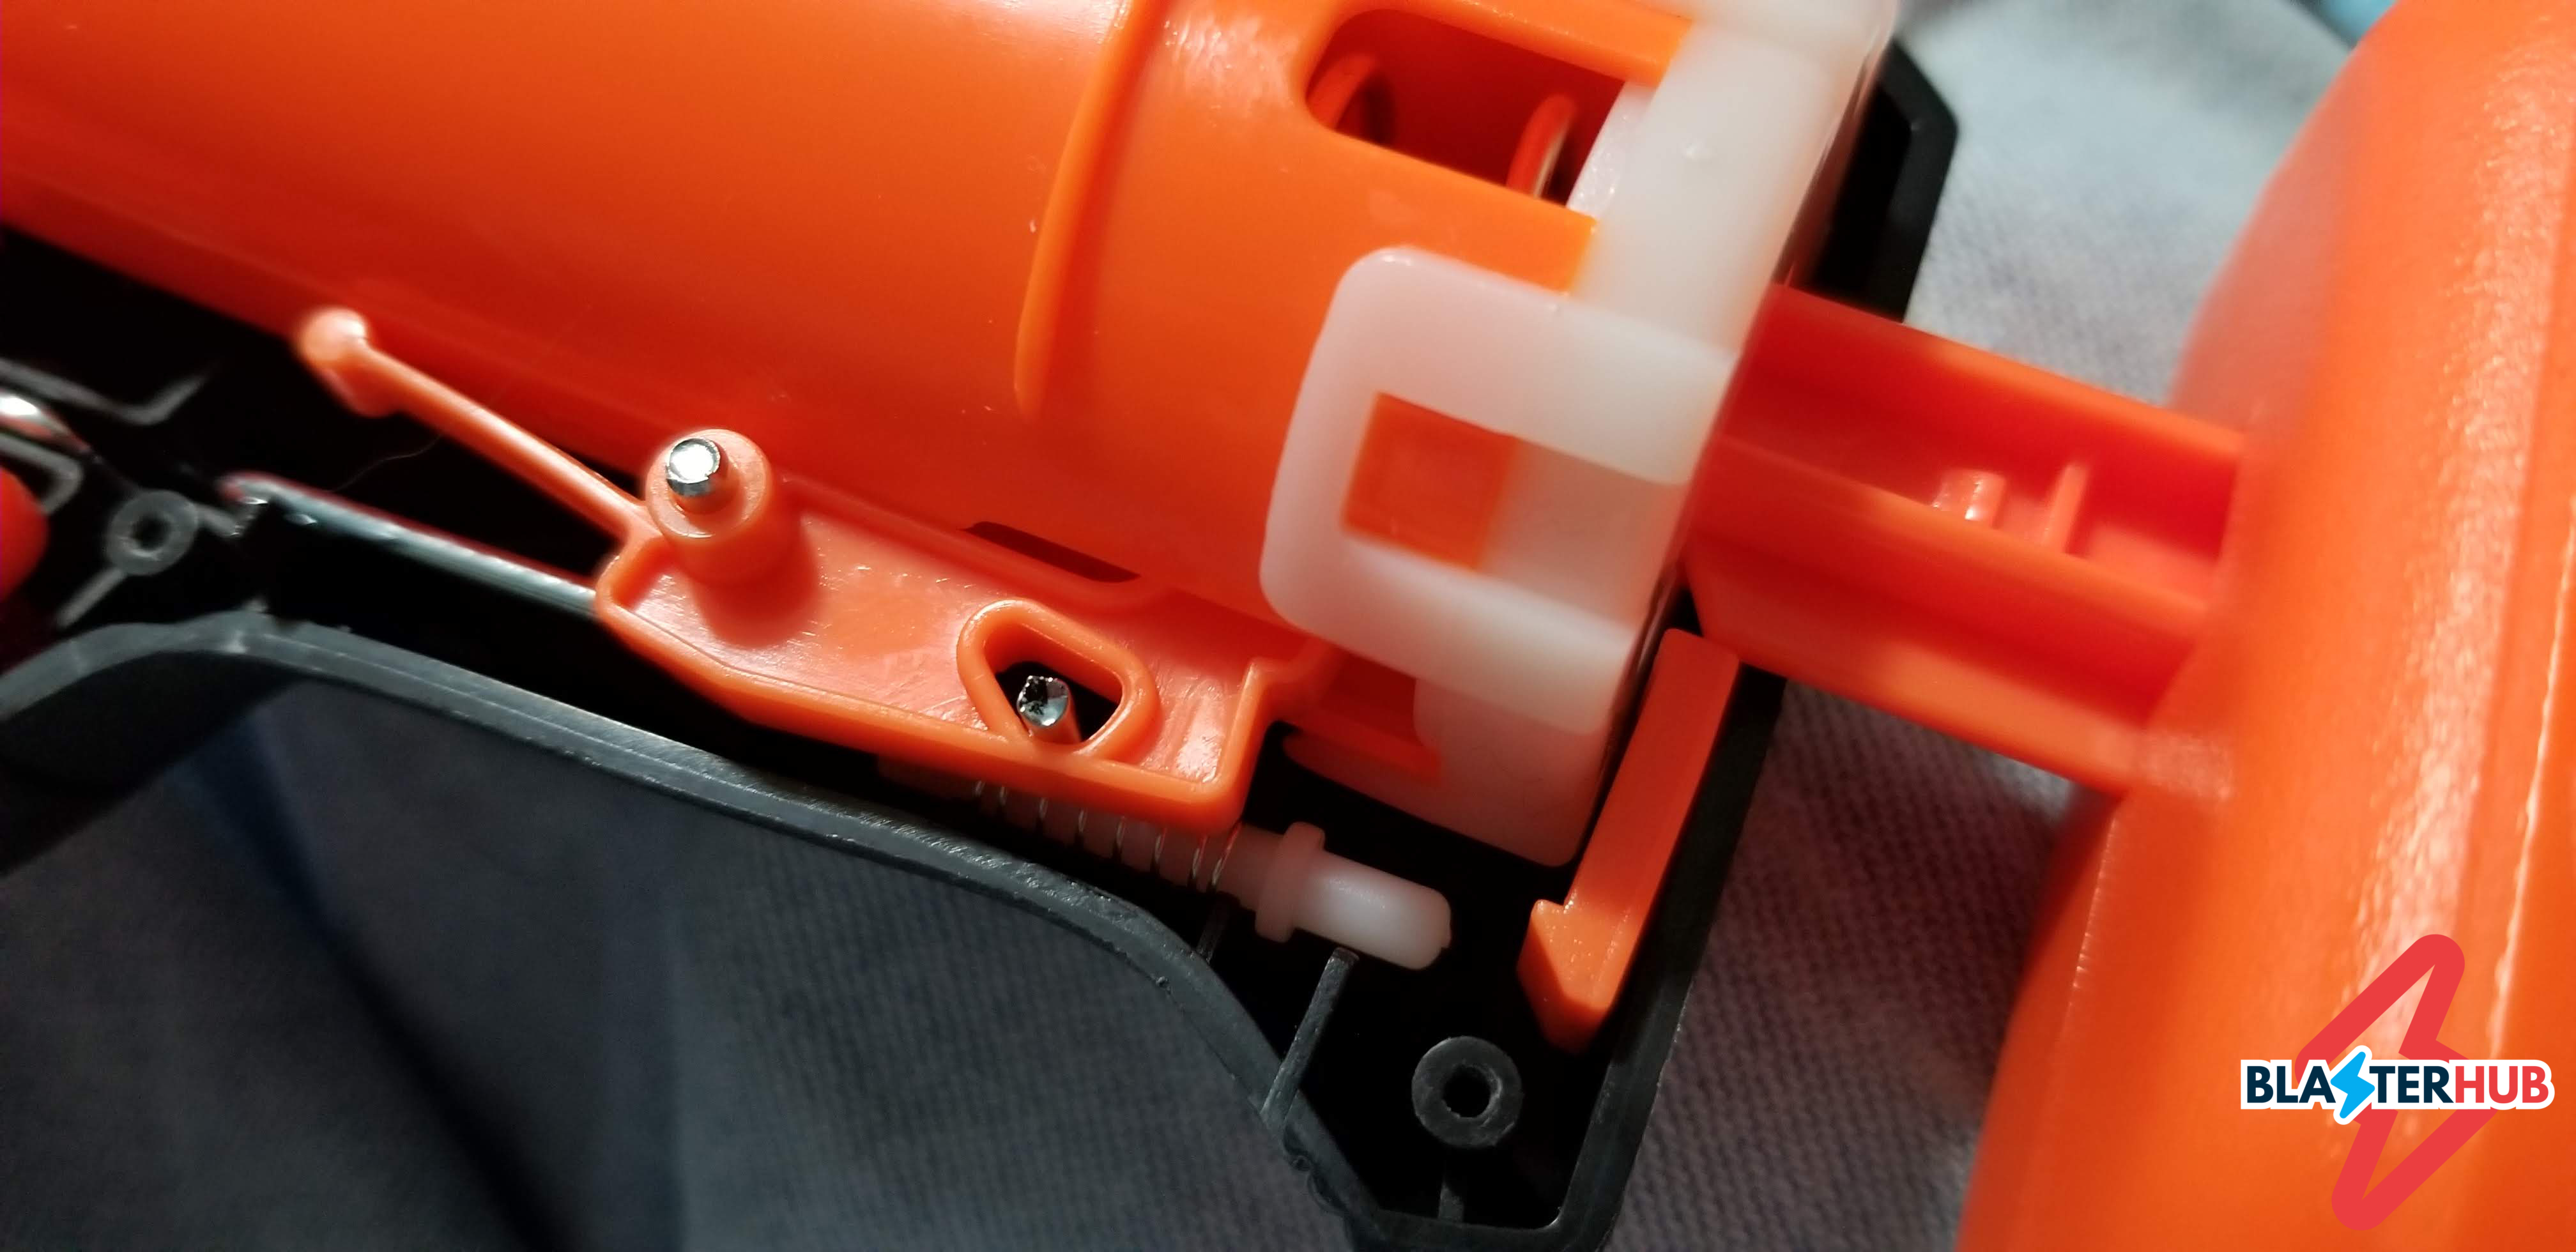 The small orange plate is what gets moved by the plunger rod. The spring-loaded white rod provides the long orange arm's tension. The remaining large orange piece is the catch.
The Knockout, of course, draws comparisons to the Jolt (and the Bigshock). However, it has to pack a lot of features into a relatively tiny space to be a Rival blaster.
Of note, aside from the placement of the many pieces, is the fact that there isn’t an AR, or more properly, a safety valve. Usually, these are pushed open when a round is present, then close as it fires. This both keeps the round at acceptable velocities for a store-bought blaster and cushions the impact of the plunger with whatever air remains.
 In the Knockout, however, the air is largely free to flow as needed – there’s no space to spare! Instead, we simply have a spring-loaded tab that helps push the ball into the tighter portion of the barrel. You can do this by hand, of course, but the tab makes for consistent placement.
Also of note is the breech itself. The shell has around 1.4″ of space, but only opens up halfway for loading Rival rounds. There are “stops” in the channel the breech rides, on either side, that could be removed or reworked if you wanted more space to work with. Of course, if you opt for darts, you may ignore this piece and just go with a brass breech.
For my experimentation, I used needle nose pliers to pull out the loading tab, then a thin screwdriver to peel up the lightly bonded support structures. That left a roughly 3/4″ diameter hole.
The Plunger
 Out of its container. Note the oval-shaped top of the plunger.
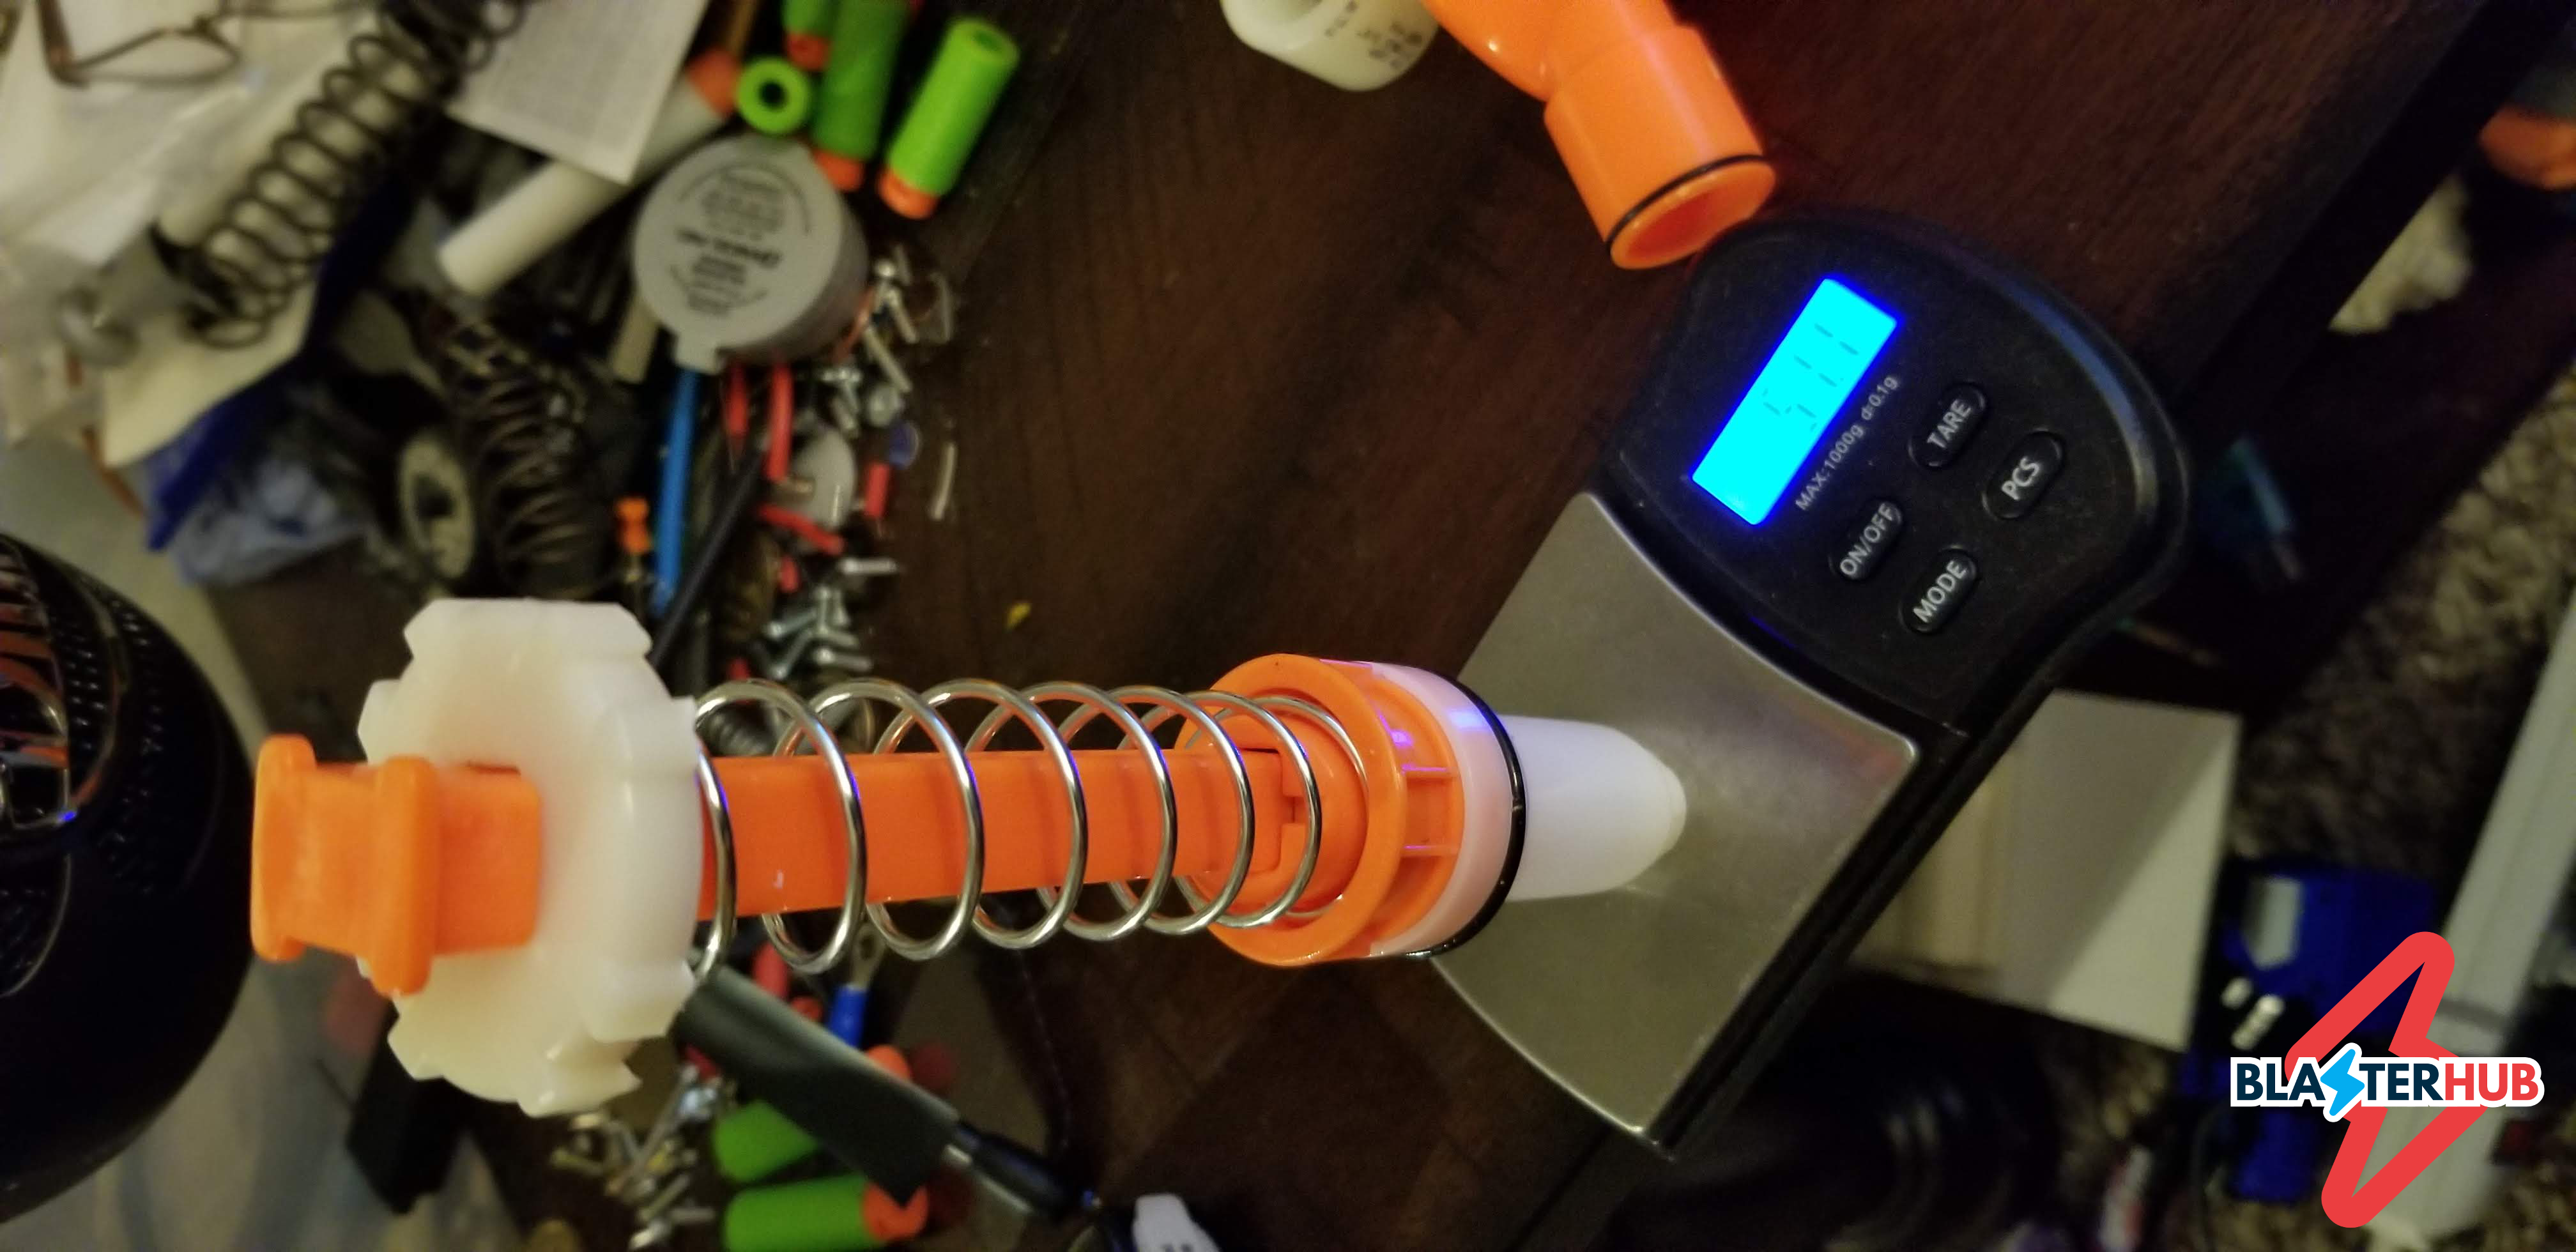 The weight of the stack.
 The weight of the handle. This, plus the plunger rod, is quite a bit of extra weight compared to the whole system. Thus, why you're supposed to push it back up prior to firing.
The plunger is quite large (and hollow). As noted, the plunger rod has to be pushed up prior to firing. The reason? It ends up being a significant chunk of the entire system’s mass, and we need the accelerated mass to be as light as possible. To that end, the plunger itself is light and hollow, which allows plunger rod retraction while primed.
The top of the plunger is ovoid, rather than simply round, and has padding at the end. This fills in the narrow space between the main body of the plunger tube and the barrel.
The o-ring on the plunger measures roughly 33.2mm in diameter. The spring is around 24mm OD.
Note that the end of the plunger has lots of solvent welding, in addition to the snap-on tabs. If you go through the effort to break off the tabs and get the end cap free, you WILL have a difficult time in reassembly. The system is under some pre-compression, and parts will want to move apart before you get the shell halves together.
And Now For a Highly Unscientific Demonstration!
 In this case, I opted to just wrap a 7.5″ length of PETG barrel tubing in electrical tape, and stuff it into the now-open barrel, after removing the loading tab. I know, highly professional work.
However, for purposes of demonstration it worked quite well. I could somewhat vacuum-load darts from the front with the initial pulling of the plunger rod. More importantly, after properly seating darts at the beginning of the barrel, shots generally hit in the 140s (in feet per second), with half darts being at the higher end of the range. Finding a proper dart/barrel match could make for a fun superstock single-shot pistol, and one you could possibly swap out the barrel on to maintain Rival functionality.