Nerf Zombiestrike Dreadbolt
Hasbro
$50
85'
Five seconds per arrow
Fun, but expensive, and ultimately not for everyone.
Nerf Zombiestrike Dreadbolt Review
July 8, 2017The Dreadbolt is an odd entry for Nerf’s 2017 Fall lineup. Until now, nearly all of the “arrow” blasters have been in the Rebelle line, fired almost exclusively from bows. The flight characteristics weren’t perfect, but they worked well enough. They also took advantage of the bow craze that happened alongside movies such as The Hunger Games. Now, however, most Rebelle blasters have been phased out, with arrow launchers largely gone.
So, what is this strange new blaster, going against the receding wave, and is it worth it?
(Disclaimer: this blaster was one of several sent to me by Hasbro for review)
A Giant Hunk of Plastic
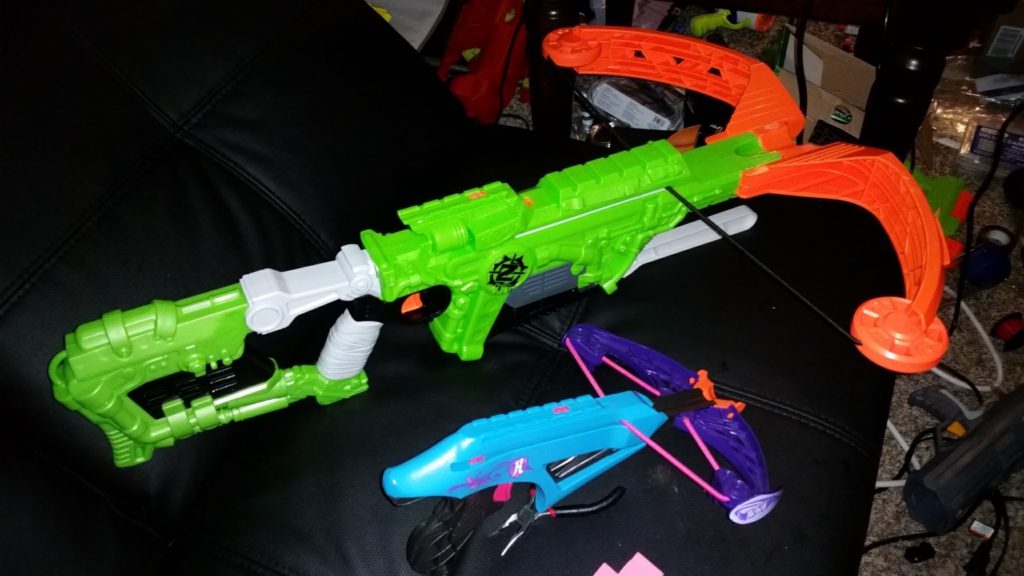 The Dreadbolt is large. Incredibly large. Just look at it beside the Rebelle Courage Crossbow. It’s little wonder why it costs so much more than its predecessor ($50 compared to $20). So large, in fact, that I wonder why you wouldn’t want to stuff a flywheel blaster inside the shell. Without the bow arms, the blaster has eerily similar dimensions to a Rapidstrike. Without the priming handle, the front would serve as a curvy and comfortable foregrip. Alas, I don’t sit in on Hasbro design team meetings.
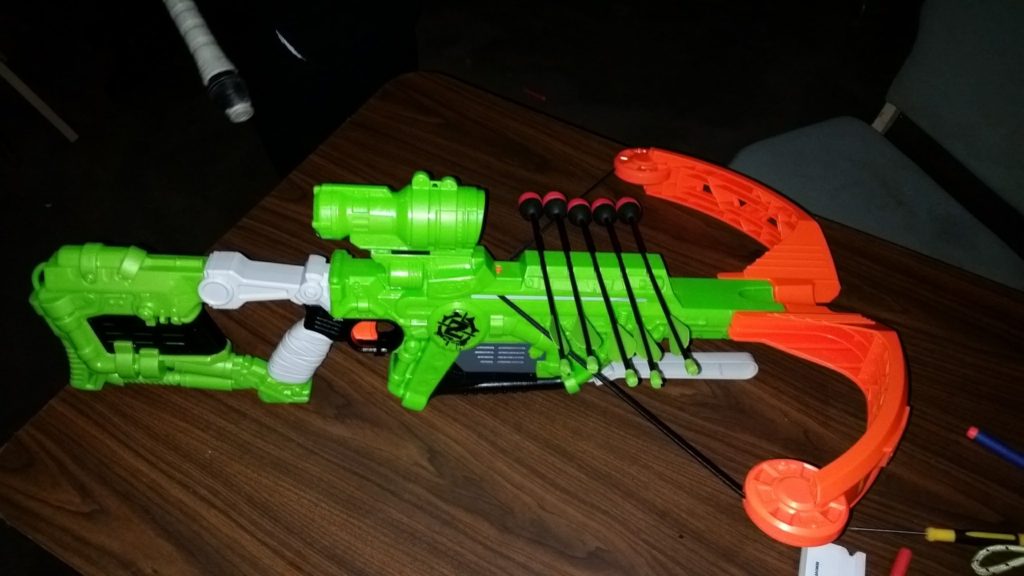 In any case, the large shell and stock make for a comfortable platform. There is storage for five arrows directly over top of the firing mechanism. The Dreadbolt comes with a detachable scope (a purely aesthetic feature). The wrench-shaped lever is the priming handle, which operates smoothly and evenly pulls back the elastic band. The bow arms themselves are a separate piece in the packaging, and require snapping into place prior to use. As usual, there are several safety locks preventing the blaster from firing without an arrow loaded, etc.
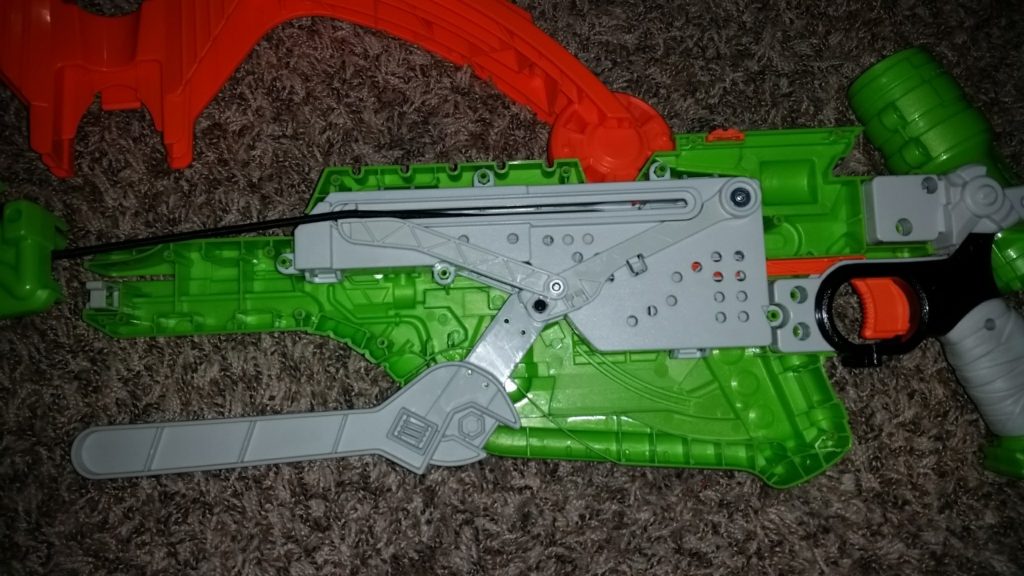 Inside the Dreadbolt
The elastic band powering the Dreadbolt is surprisingly strong. As such, a proper priming assembly is needed. The lever-action helps to prime the blaster with relatively little effort – it pulls two plastic hooks on either side of the assembly. Contained within the priming handle is a sort of ratcheting mechanism, preventing you from only priming the blaster part of the way. It’s all or nothing once you start.
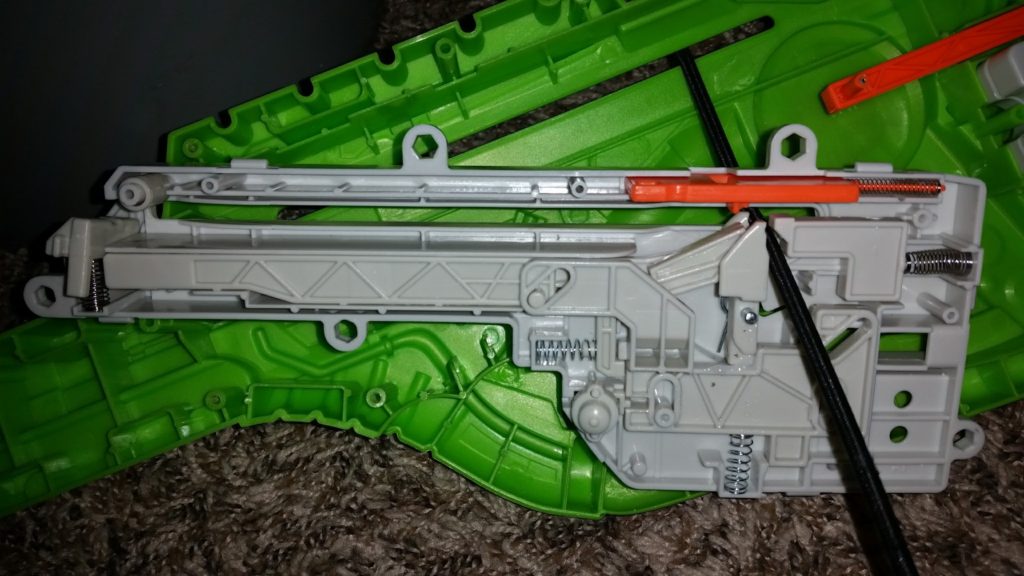 Further inside, we can see the various locks within the system to prevent anything but Nerf arrows being fired. One safety is directly at the mouth of the ammo slot, while another sits directly between the two catch ramps. If both safeties are activated by a properly loaded arrow, pulling the trigger will release the catch ramp assembly to swing forward. This launches the arrow. Easy enough to understand.
The orange piece at the top is an indicator. If you’ve properly loaded your arrow, it will show through a hole in the shell, similar to a priming indicator on a Longshot or Centurion. If your blaster isn’t firing, look there first to see if your arrow is loaded all the way in.
Performace
The Dreadbolt fires decently well. In static testing, the blaster can hit up to 40′ with level shots, and about 85′ with angled shots. Assuming no wind, the shots are also largely accurate. That’s a characteristic of the ammo, however, not the blaster. It should be noted that performance will vary with ammo condition – used and bent arrows will not fire nearly as well.
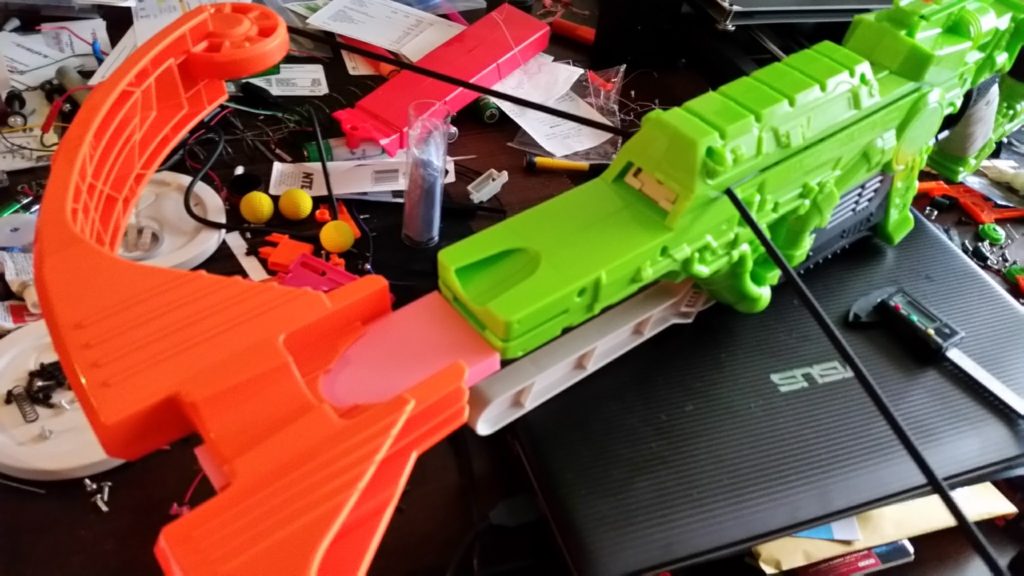 Even so, the performance was disappointing for a $50 blaster. The Courage Crossbow has a roughly 10′ deficiency in comparison, but is far less expensive. This led me to look into ways to improve the ranges, whether by tightening the elastic or some other method. That other method turned out to be 3d printing.
Due to the way the holes in both the blaster and bow arms line up, there was an opportunity to set the bow arms farther forward, as well as slightly lower. This increases the tension in the elastic, and it keeps the bow arms out of the way of the accelerating arrows. The increased force at launch tends to make arrows flex more before stable flight ensues; lowering the arms prevents the head from impacting and then simply bouncing ten feet in a random direction. The spacer I made allows angled shots of up to 120′, with the accuracy maintained. It is also removable so that you aren’t storing the blaster with tension on the string. I will be uploading the .stl file to Thingiverse in short order, where I’m sure others can improve upon it. It’s not a perfect fit, but it’s really darn close.
War Setting
With the spacer, the Dreadbolt became much more viable. I tried it out at Endwar during Mission Zero (the “warmup” prior to main activities). It was surprisingly effective at hitting targets at a distance, such as boomers. The large ammo travels slower than darts, and that has to be accounted for. The reload time is also an issue. Even with the easy lever priming, you need at least five seconds before you can get another shot off. Regardless, there is nothing but sheer joy when it comes to launching a large projectile, hearing it whistle, and watching it hit a target in the distance. I believe the arrows were clocked in the 80s in feet per second during Foamcon.
I’ve also used it at both indoor and outdoor wars. It’s at an obvious disadvantage against full auto flywheel systems and dart blasters in general. Even so, large flying ammo makes everyone duck out of the way and buys time for the user, so you’re not completely outclassed. Just mostly 🙂
Final Thoughts
The Dreadbolt is a fun blaster to use, even if the price is too high. You’re paying for a giant, albeit wonderfully comfortable shell. The rate of fire is abysmal compared to the vast majority of Nerf blasters The range is decent, and can be improved in creative ways. Ultimately, it comes down to how much you like using odd ammo types, or if you do any games where such ammo would be useful. Even then, blasters like the Rebelle Courage Crossbow offer decent performance for a far lower price.
In the end, a blaster can only be fun if you actually use it. If you can’t see yourself using the Dreadbolt regularly, then it’s not worth buying.

