Mod Project: Replacement Nerf Rival Rechargeable Pack
March 2, 2021During a recent search, I found out that not only is the Nerf Rival NiMH pack for the Nemesis/Khaos/Hera no longer in production, but it’s only available at stupidly high prices. As such, a replacement was needed for those who want the benefits, but aren’t worried about modifying their blasters. I can think of several instances, from those simply wanting stock performance without spending on Alkalines to arenas in need of a replacement. As such, I designed a conversion kit for plugging a Sub-C NiMH pack into the blaster. More details down below. (Link to the files HERE on Thingiverse)
Making Contact
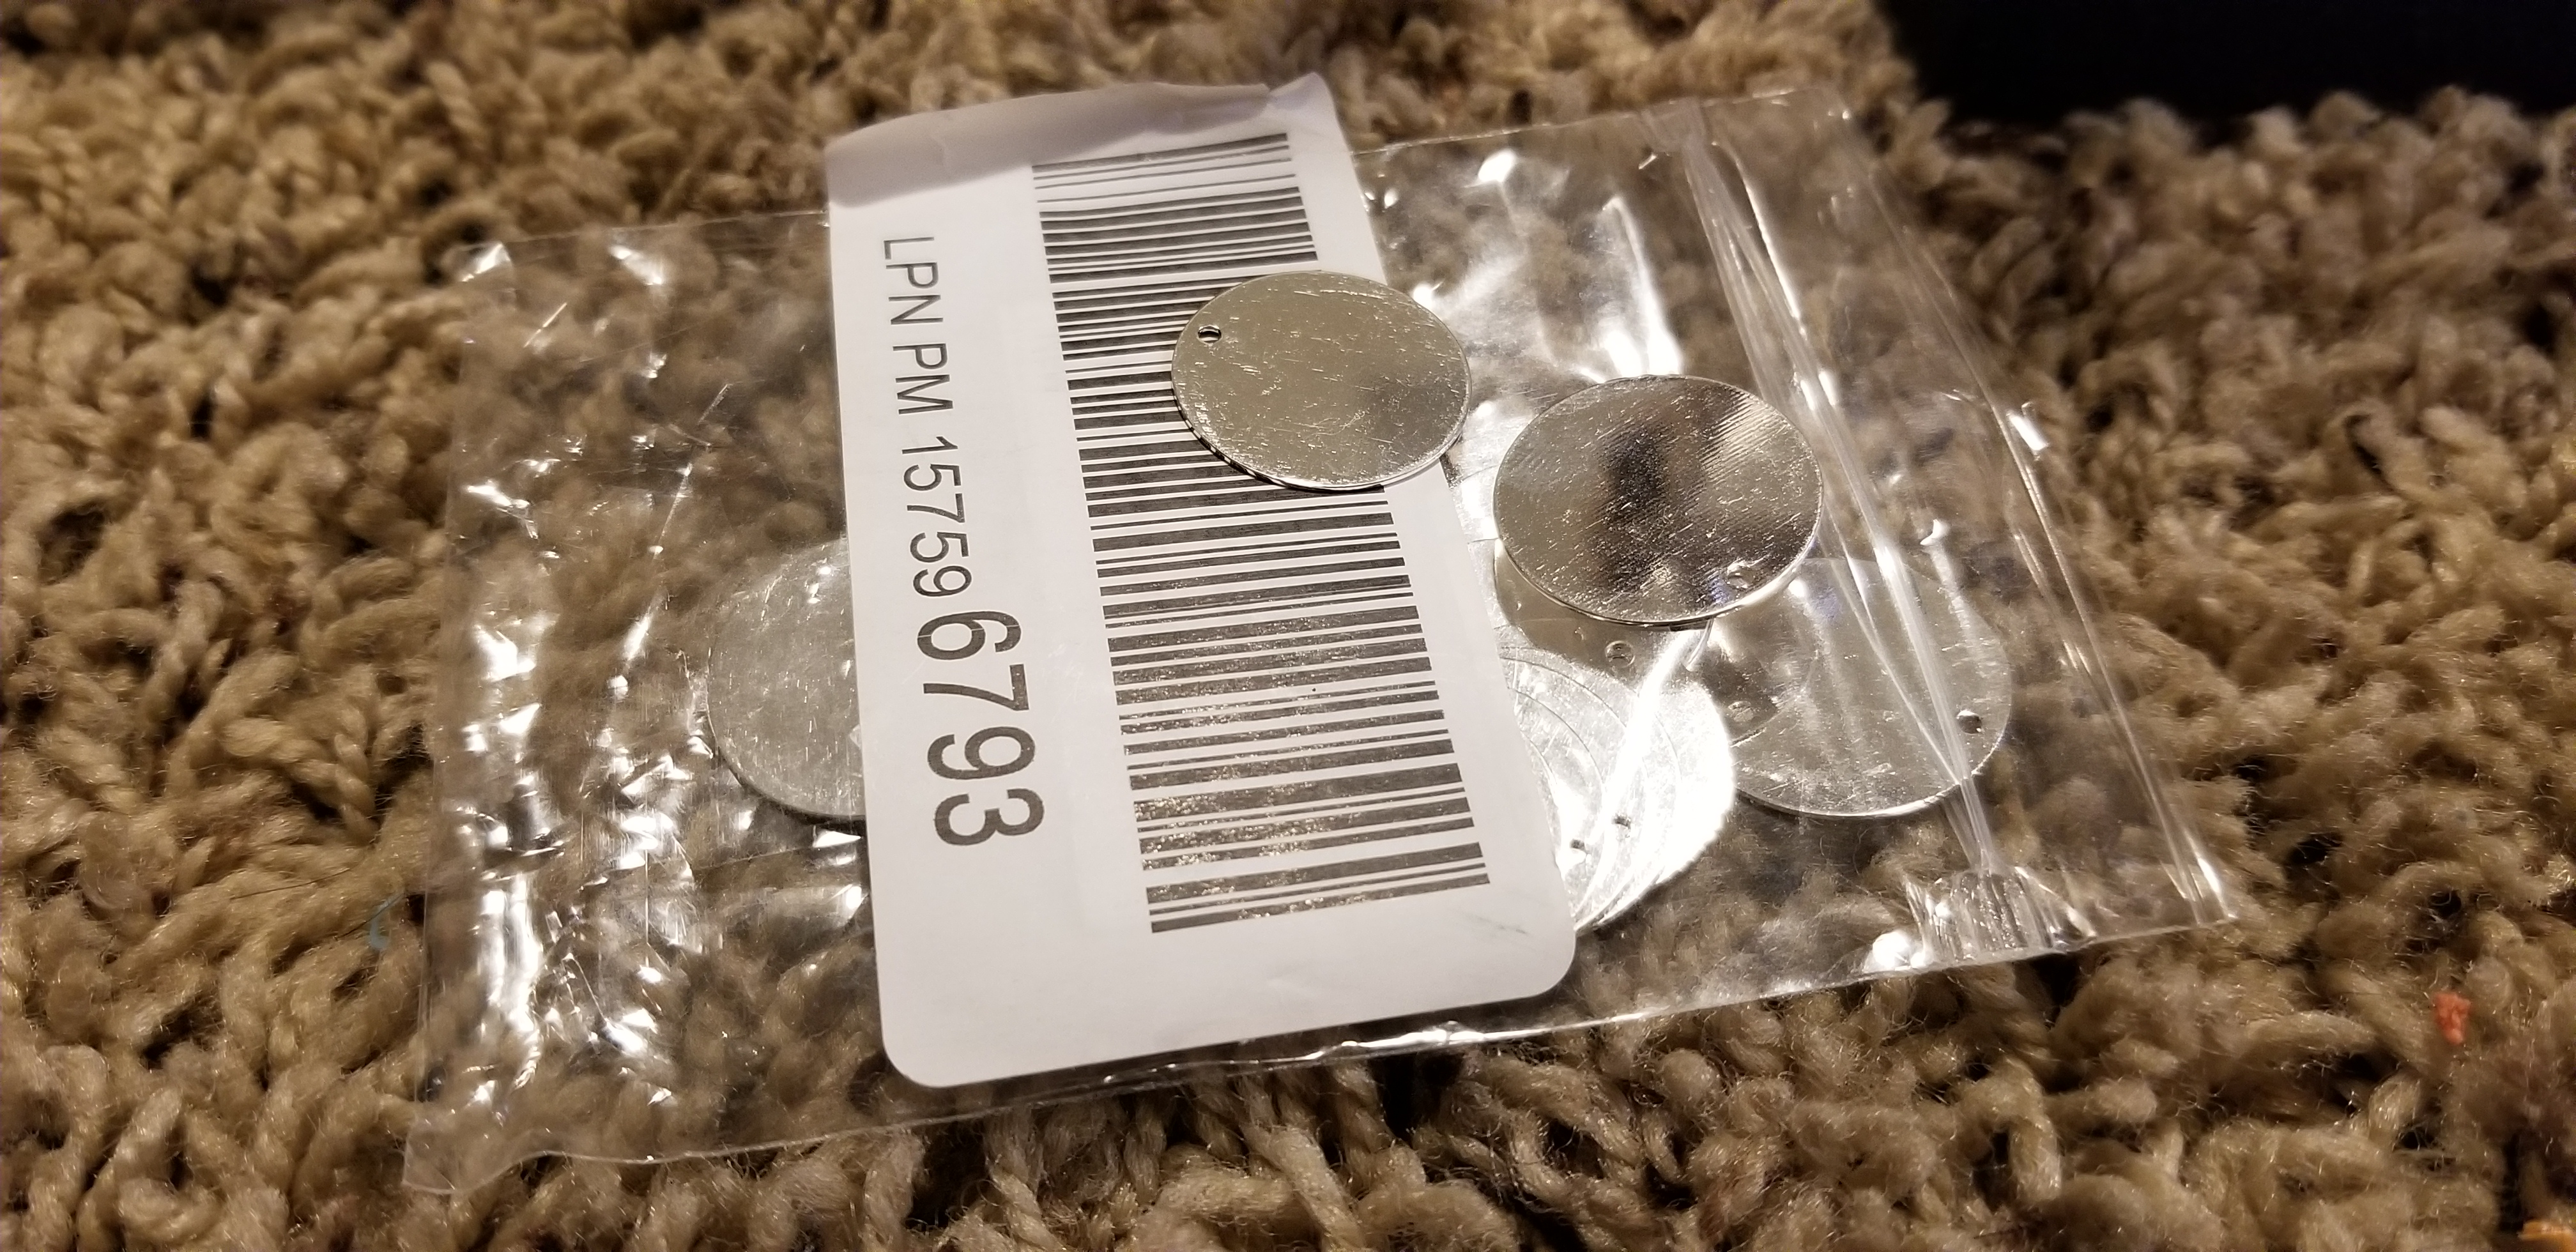 Since we’re aiming for a drop-in pack, we have to have some sort of metal contact at the bottom. To that end, I got 20mm metal stamp blanks. These normally get used in arts and crafts, but depending on the type of metal, they can be useful for other things. I ordered a pack of 18 gauge copper discs, plated in silver. However, other materials can also be used – nickel, nickel silver, or plain copper. They’ can also be found cheaply on Etsy. Granted, some materials are better than others, electrically speaking. But for this application, they’ll all be fine. Avoid aluminum blanks, as they don’t exactly solder to copper wire.
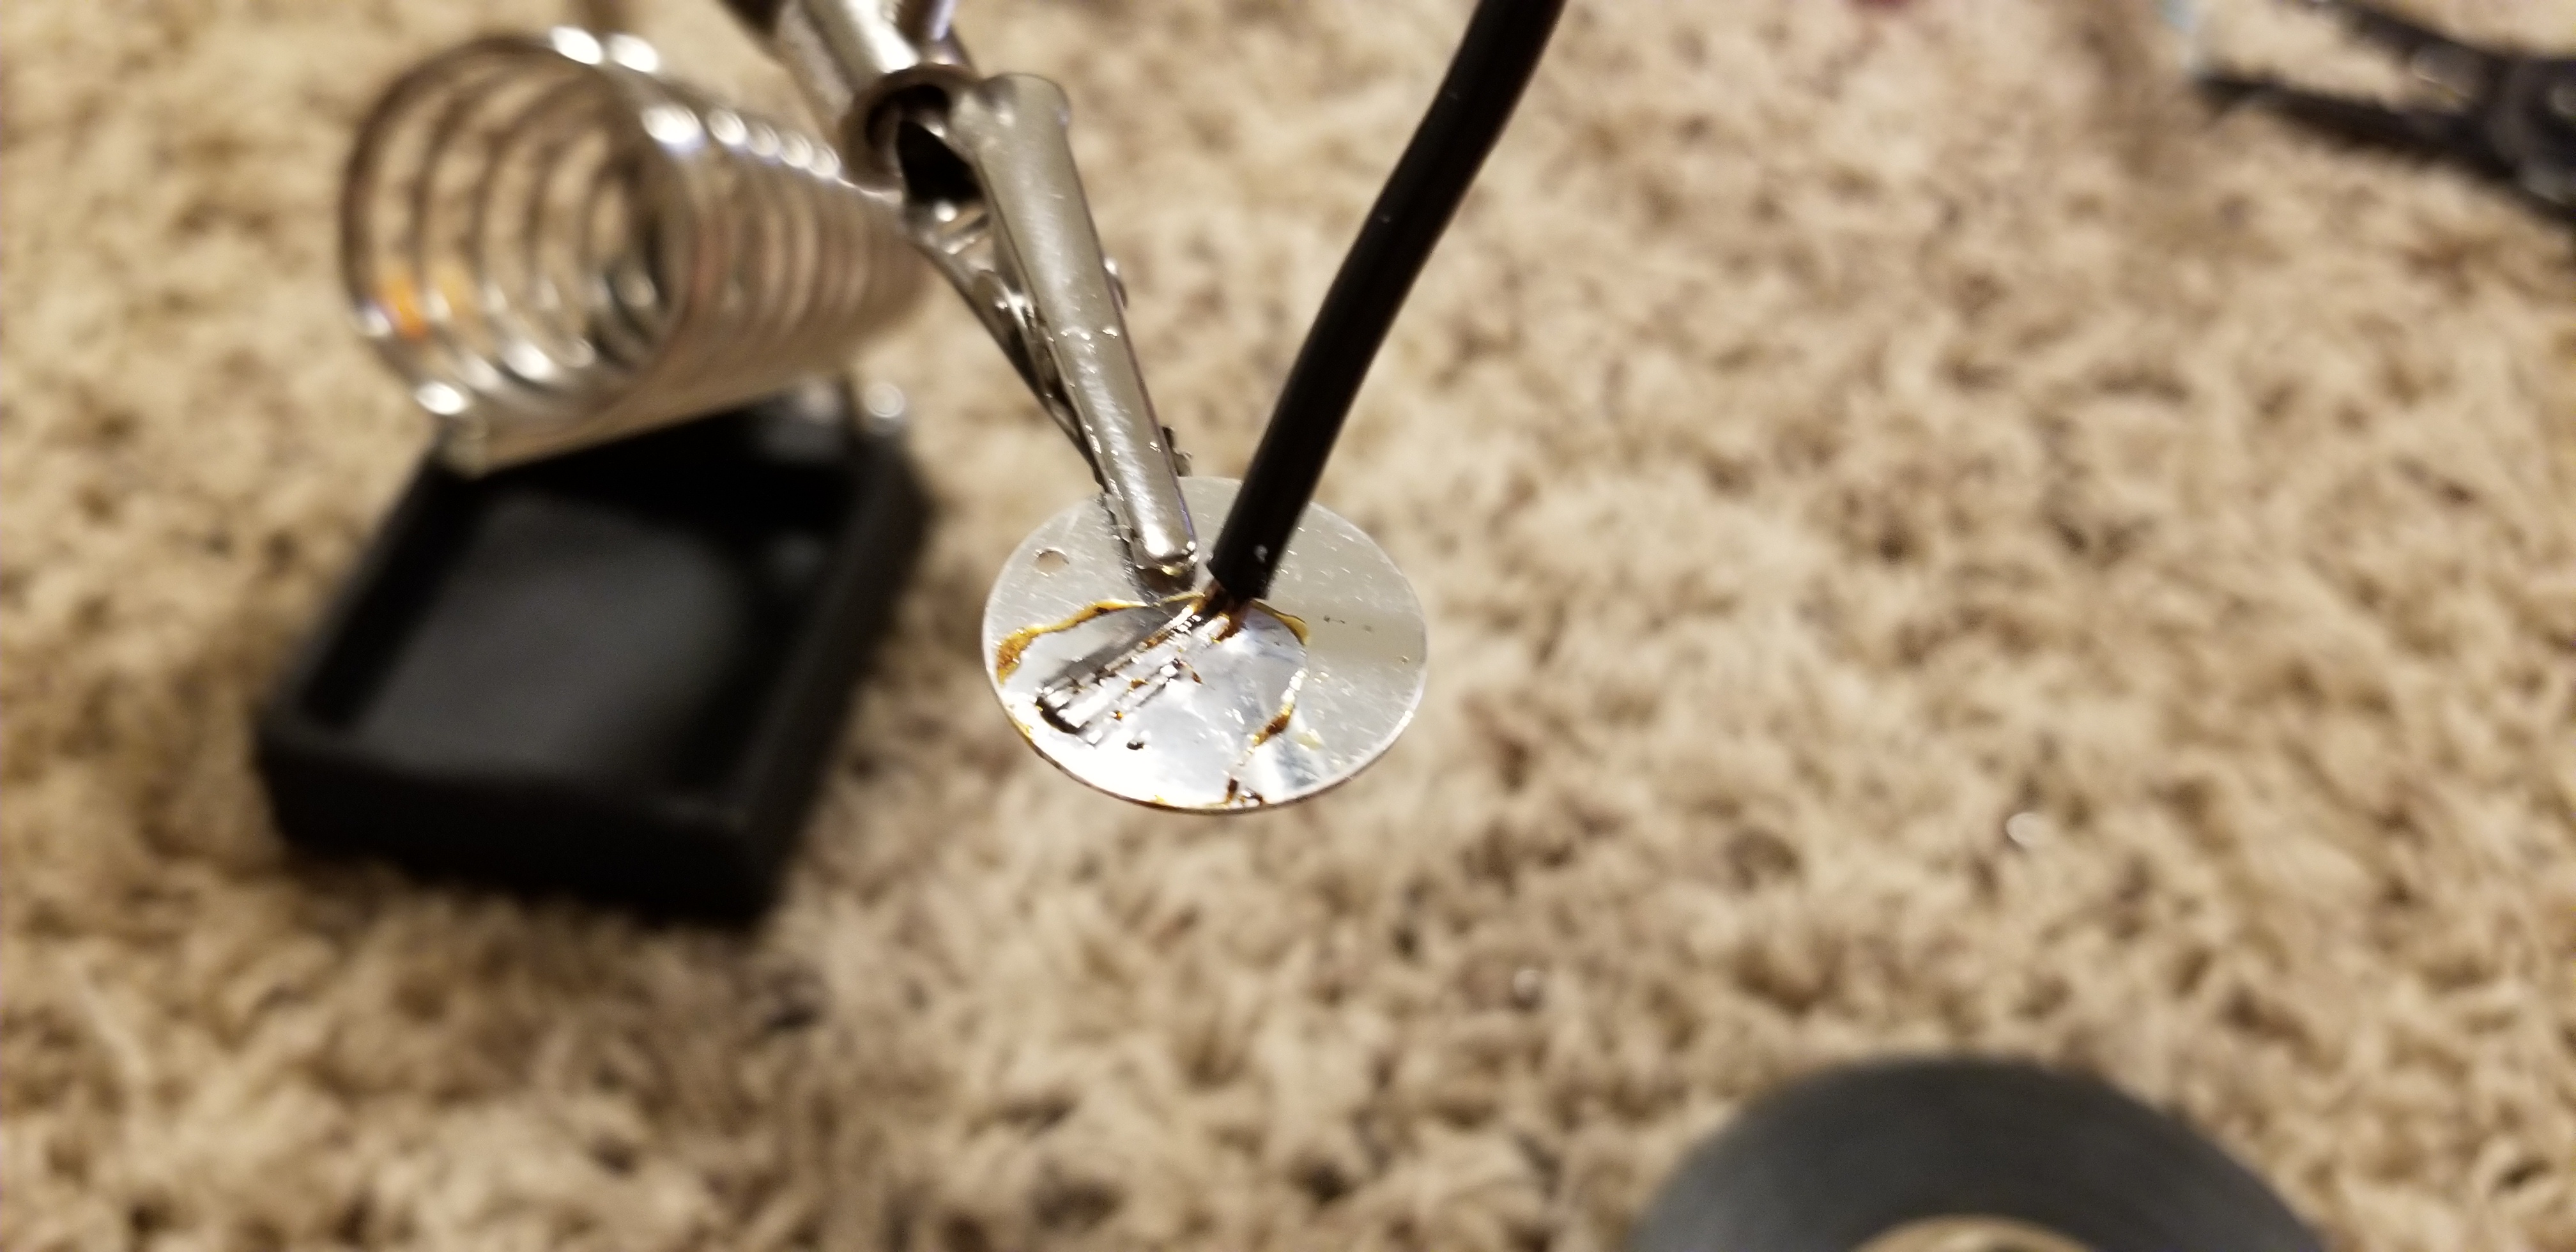 Once you have the blanks, solder the end of your wires to them. Soldering copper to copper with regular lead is by far the easiest, but should you be like me and want to be all fancy, silver-bearing solder will also work. The main idea, however, is to actually get the solder and the top layer of metal to bond together, so that you make a strong joint. In addition, orient the wire as shown, as that will make installation easier.
Time for 3D Printing!
 The framework consists of three pieces: a main base with slots for the wires and contacts, a thin cover for those slits, and a retention piece for the battery. Use some needle-nose pliers to slide in the contacts. If you soldered as pictured, the exposed wire/solder should face out. Tuck the wires into the channel and feed through to the end. Push the cover into the slot. You may need to flip the assembly over and press down on a hard surface; it’s meant to stay there by friction. There’s a tab for removing it if you really need to, but assume you’re destroying the cover if you do that.
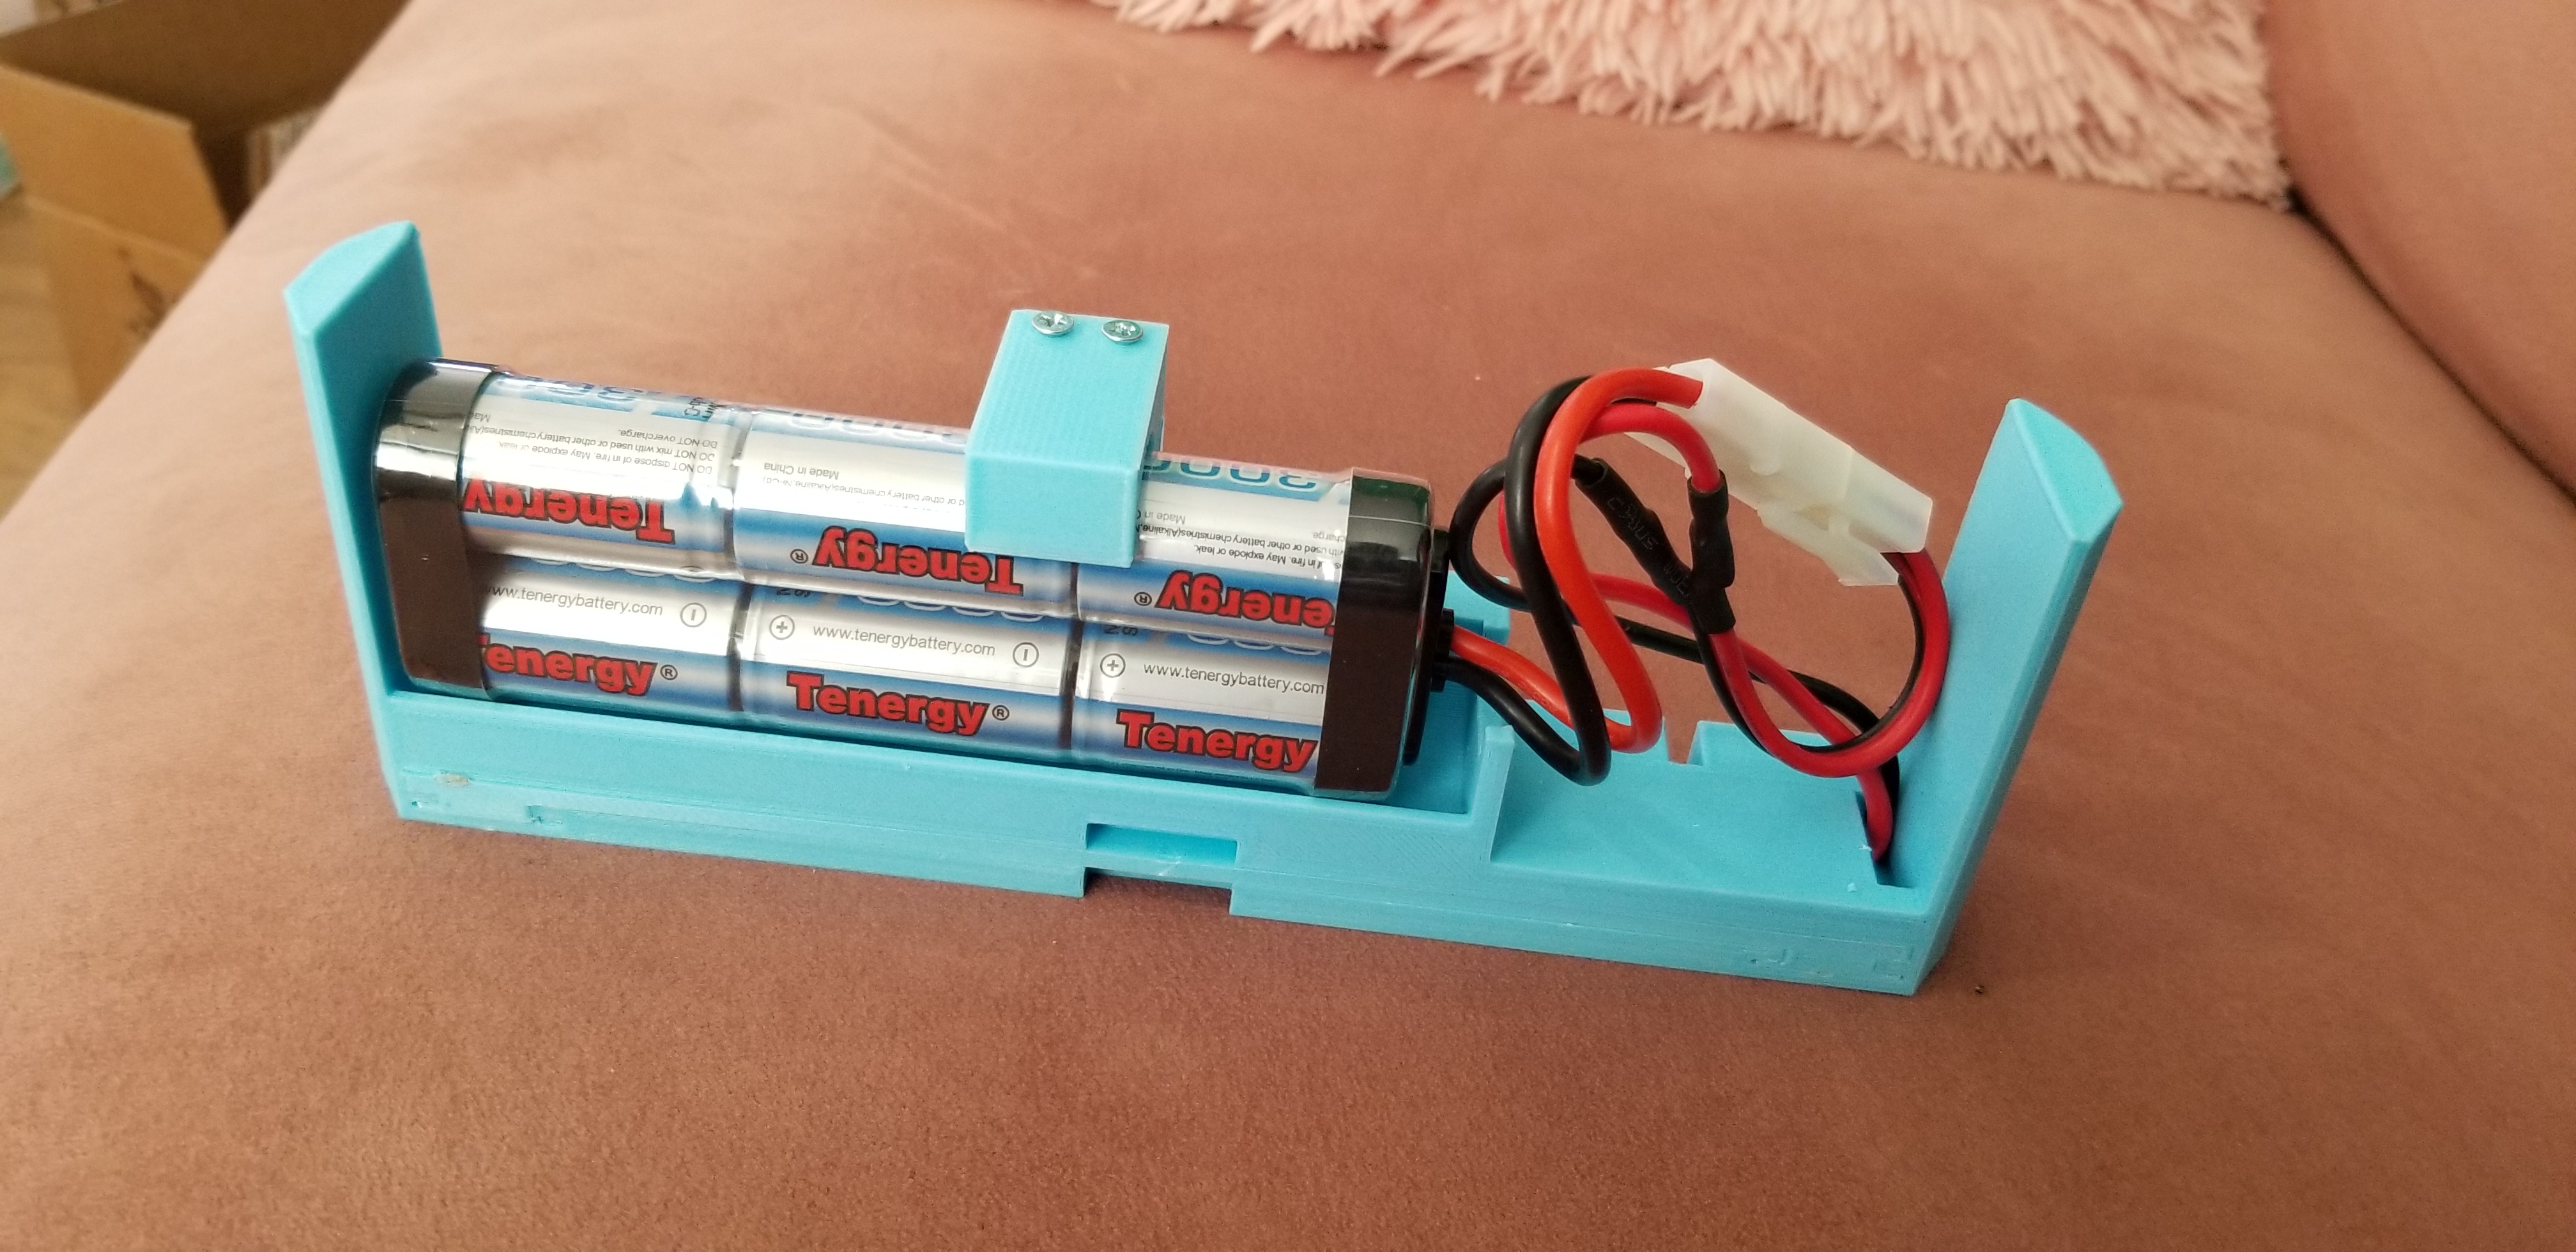 Once you’ve done that, solder your wires to the appropriate connectors; in my case, I simply wired up a female (charger side) Tamiya connector. You might need an XT60, Deans, or other connector. Once that is done, screw down the retention piece with two M3x20mm machine screws. Now you can drop the (presumably charged) pack in and go.
Last Thoughts
I have two versions uploaded, for 7.2V packs and 9.6v packs. Those seem to be the most commonly used options.
The assembly should drop in and be easily removed. Simply disconnect the pack, and plug it into an appropriate charging lead when needed.